
What is Image to Image Generation and How to Use it?
Written on . Posted in AI.
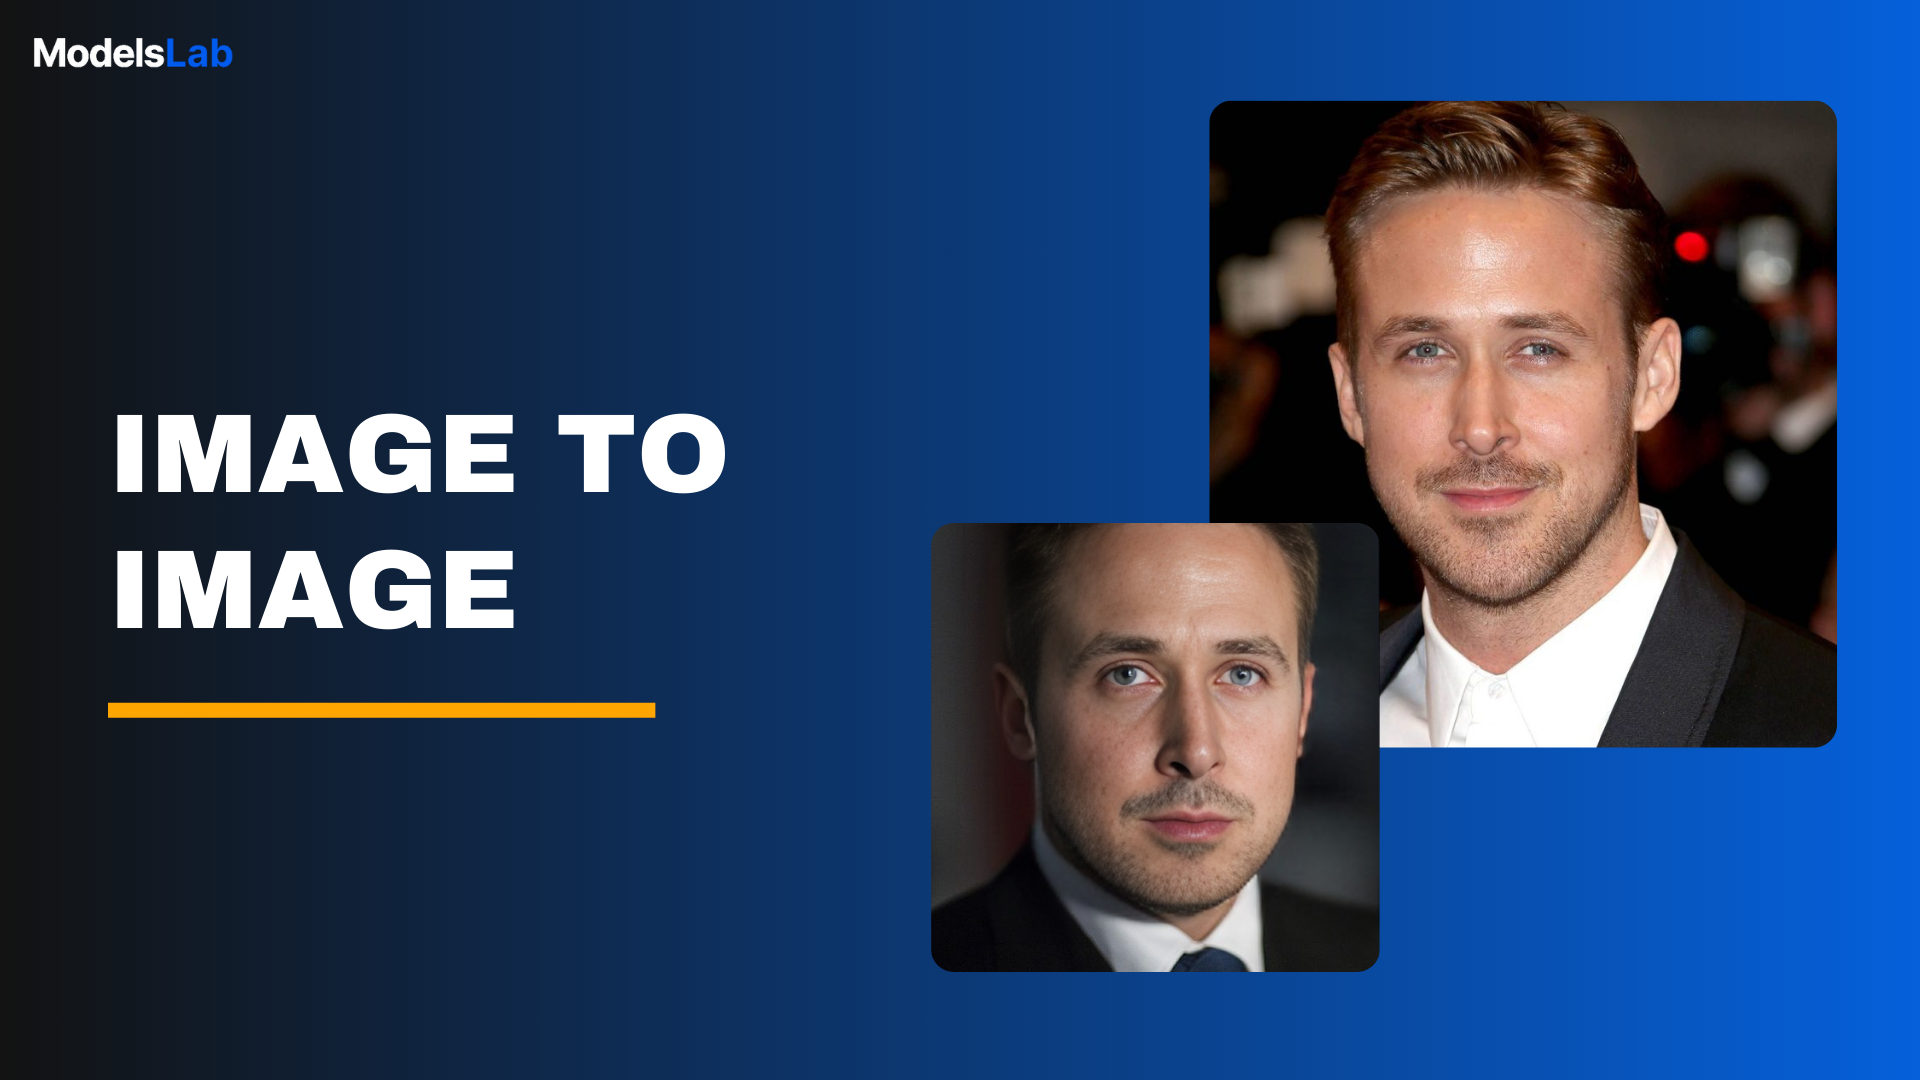
Image to image generation is became popular in recent years. With tools like Modelslab’s Image to Image API, you can transform existing images into stunning new creations quickly and easily. This powerful tool allows you to focus on your artistic vision without getting bogged down by technical complexities.
In this guide, we’ll walk you through how to set up and use Modelslab’s API, so you can start generating impressive images from your existing images right away.
Learning Objectives:
Understand the basics of image to image technology.
Learn about Modelslab's Image to Image API and its key features.
Set up a Modelslab account and get an API key.
Generate images from existing visuals using the Modelslab dashboard and API.
Use advanced features like customization, batch processing, and custom workflows.
Troubleshoot common issues with API keys and image generation.
Explore different use cases for image to image technology in various industries.
What is Modelslab Image to Image?
Modelslab's Image to Image API is an advanced tool that allows users to transform existing images into high-quality visuals based on specific prompts or modifications. By simply uploading an image and providing transformation instructions, you can create visually captivating graphics without requiring extensive technical skills or specialized hardware.
Key Features and Benefits
High-Quality Image Transformation: Generates detailed and visually stunning modifications from existing images.
Ease of Use: Simplifies the process of image enhancement, making it accessible even for non-technical users.
No GPU Management Required: Handles all computational resources seamlessly, allowing you to focus on creativity.
Versatile Applications: Perfect for various industries, including marketing, content creation, and product design.
Fast and Efficient: Delivers results promptly, facilitating quick iterations and creative experiments.
How Image to Image Technology Works
Image to image technology converts existing visuals into new representations based on user inputs. This process involves several steps:
Image Processing: The uploaded image is analyzed to understand its content and context.
Image Enhancement or Modification: The system uses AI models to generate a new image that aligns with the uploaded visual and the transformation instructions.
The backbone of image to image technology relies on advanced AI models, such as Generative Adversarial Networks (GANs) or Convolutional Neural Networks (CNNs). These models are trained on extensive datasets to learn how to accurately manipulate images based on specified prompts.
Getting Started with Modelslab's Image to Image
Step-by-Step Guide to Sign Up
Visit the Modelslab Website: Go to the Modelslab website.
Sign Up: Click on the "Sign Up" or "Get Started" button, typically located at the top right of the homepage.
Provide Information: Enter your email address, create a password, and fill in any required details such as your name and organization.
Verify Your Email: Check your inbox for a verification email from Modelslab. Click the link provided to verify your email address.
Log In: Once your email is verified, return to the Modelslab site and log in with your newly created account credentials.
Generate AI Images in the Playground
Once logged into your Modelslab account, you’ll be greeted by the dashboard.
Access the Playground: At the top of the header, find the option labeled "Playground." Click on this to access various tools.
Find the Image Editing Tool: In the Playground section, look for and select the "Image Editing" option.
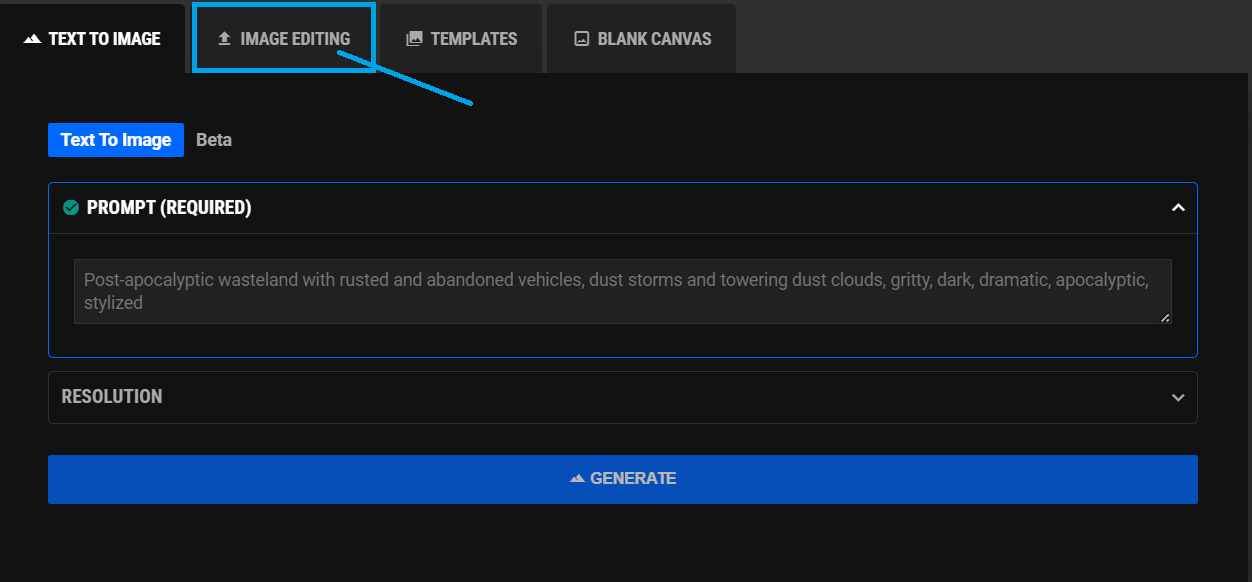
Upload Your Image: Click on the upload button to select the image you want to transform.
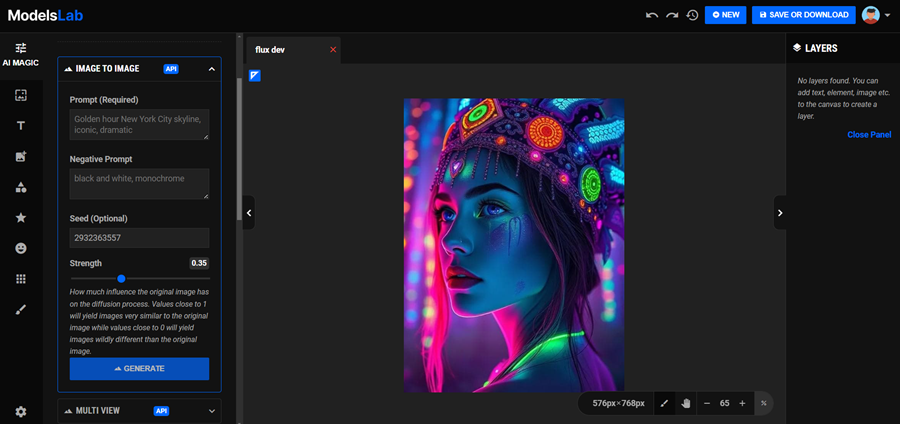
You will see lot's of options for Image Editing, after uploading the image.
Steps to Configure Your Transformation Prompt
Select the "Image to Image" transformation mode.
Enter the description for the image you want to generate in the prompt field (e.g., "Golden hour New York City skyline, iconic, dramatic").
Add a negative prompt to exclude specific elements if needed (e.g., "black and white, monochrome").
Set a seed value if you want to control reproducibility (optional).
Adjust the strength to determine how much influence the original image will have on the final output. For example, a strength of 0.35 will give moderate influence, while values closer to 1 will keep the image more similar to the original.
You can crop, resize and rotate the image according to your need.
Choose how many variations of the image you want to generate by selecting the number of samples.
Specify the image dimensions according to your requirements.
Finally, click the "Generate" button to start the image creation process.
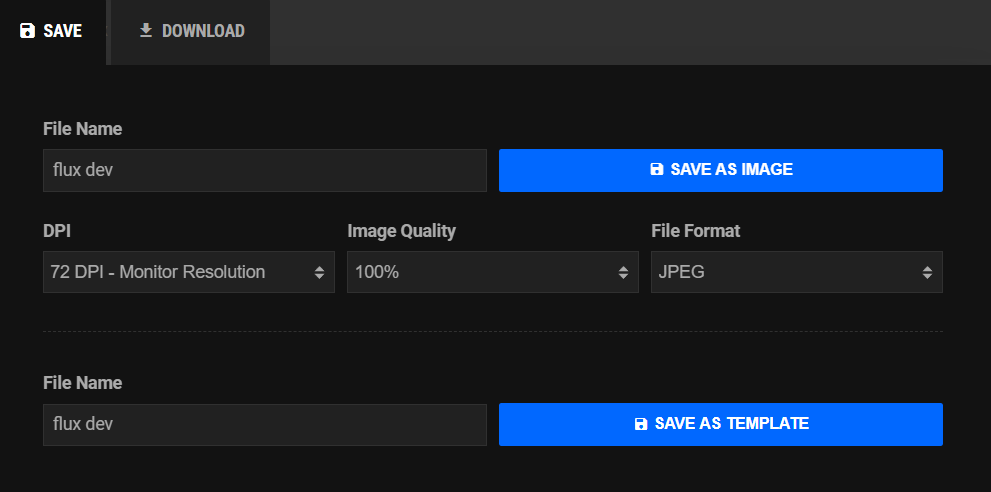
After generating the image, you can "Save" Or "Download"
View and Adjust
Once the images are generated, you can zoom in and out to inspect the quality of each image. Modelslab’s Image to Image API offers a wide range of possibilities for your creative needs.
Setting Up API Access and Generating Images
Create images using your API key by following these steps:
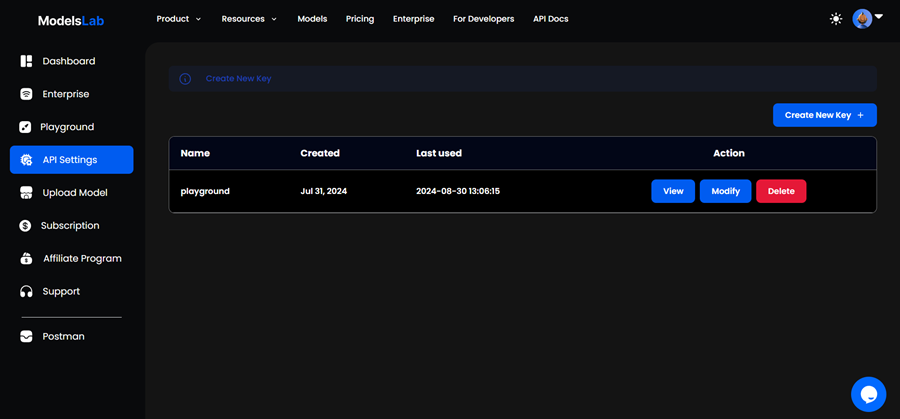
Obtain Your API Key:
On the right side of the dashboard, find the option labeled "My Account."
Navigate to "Admin," then select "API Settings."
Click on "Create New API Key" to generate your API key.
Access API Documentation:
Go to the API Documentation for Modelslab.
Open Postman to proceed with making API requests.
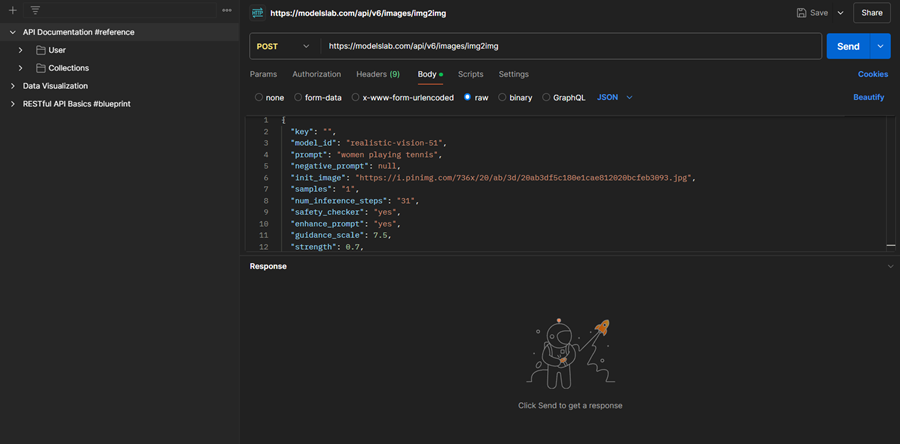
Making the POST Request:
Endpoint: Make a POST request to
https://modelslab.com/api/v6/realtime/image2img.Request Body: Pass the required parameters as specified in the API documentation.
Configure the Request in Postman:
Click on the "Body" tab.
Select "raw" and choose "JSON" from the dropdown menu.
Copy the body code from the API documentation according to your selected language (JSON/JavaScript/HTML/XML).
Add your API key in double quotes (" "). Replace the placeholder key with your actual API key.
Update the parameters and prompt as needed.
Send the POST Request:
Click on "Send" to execute the request and wait a few seconds for the response.
Fetch the Result:
Once the request is complete, click on "Fetch Result" in the response section.
Ensure that the request method is set to POST and that the API key is included.
View Your Image:
After sending the POST request, you will receive an output link in the response. Click on this link to retrieve your image.
You’ve now successfully set up the API and transformed an image using Modelslab’s Image to Image API.
Advanced Features and Customization
The Dreambooth Image to Image API provides numerous advanced features and customization options to enhance your image generation process. With a wide array of parameters, you can fine-tune every aspect of the image creation, ensuring the output aligns with your creative vision.
Model Customization: Choose between public models or your own trained models by passing the
model_id. This flexibility allows you to generate images with specific artistic styles or technical requirements.Prompt Enhancement: Optimize the result by using the
promptandnegative_promptfields to include or exclude certain elements in the generated image. You can further boost the effectiveness of the prompt using theenhance_promptfeature, which improves the description for more accurate results.Style Adjustment: Select from a vast range of artistic styles and filters, including options like cinematic, abstract, surrealism, or even highly specialized genres such as "art-deco" or "minimalism." The
enhance_styleparameter lets you tailor the image’s aesthetic to meet specific project needs.LoRa Model Integration: For more granular control over the image generation, use the
lora_modelandlora_strengthparameters to integrate lightweight fine-tuning models (LoRa). This enables the blending of different LoRa models to create unique and intricate image outputs.
For detailed usage and examples, refer to the API documentation or watch the simple how-to video.
Scheduler Support: Use different scheduling algorithms like DDIM, Euler, and DPMSolver to guide the image generation process, allowing for smoother denoising and more refined results. This provides flexibility in the workflow and ensures high-quality images.
Safety and Content Control: The API includes a built-in
safety_checkerfeature that automatically detects NSFW content and offers options like blurring or pixelating sensitive images. This ensures compliance with content guidelines while maintaining the integrity of your creative work.IP Adapter and Clip Skip: Use advanced features such as the
ip_adapter_idandclip_skipto influence how reference images are adapted or how certain model layers are skipped, giving you additional creative control over the final output.Webhook and Base64 Response: For seamless integration into automated workflows, set a
webhookto receive a POST request once the image is generated. You can also receive images in a base64 format, simplifying their inclusion in web applications or other software.
With these advanced customization features, the Dreambooth Image to Image API empowers users to generate high-quality, tailored images that fit their unique specifications.
Why Choose Our Image to Image Service
Endless Creativity: Our Image to Image service offers a diverse range of customization options, allowing you to transform your images into unique creations that fit any project or idea.
User-Friendly Interface: With a straightforward API, generating images is as easy as sending a request. You don’t need to be a technical expert to create stunning visuals.
High-Quality Results: We prioritize image quality, ensuring that the generated outputs are sharp, vibrant, and true to your specifications.
Rapid Processing: Enjoy quick image transformations with our optimized servers, designed for fast processing times to keep your projects moving smoothly.
Flexibility and Control: Tailor your image transformations with options like prompt descriptions and style enhancements, giving you complete control over the final result.

Safe and Secure: Our built-in safety checker helps ensure that inappropriate content is filtered out, so you can use our service confidently.
Unlimited Possibilities: With no restrictions on the number of images you can generate, the only limit is your imagination. Explore various styles and ideas without constraints.
Custom Workflows: Create and optimize your own image generation workflows to meet specific requirements, enhancing your creative process.
Training Capabilities: Personalize your experience by training models with your own images, allowing you to generate visuals that truly reflect your brand identity.
Dedicated Support: Our team is here to help you every step of the way, providing assistance and guidance to ensure you get the most out of our service.
Try Modelslab's Image to Image Generation now!
Use Cases of Image to Image Generation
Image to image generation technology offers a wide range of applications across various industries. Here are some prominent use cases and examples showcasing its versatility:
Marketing and Advertising
Custom Ad Campaigns: Generate unique visuals based on specific ad copy or campaign themes.
Social Media Content: Produce tailored images for social media posts and advertisements quickly.
Content Creation
Blog and Article Illustrations: Automatically generate relevant images to complement blog posts or articles.
Book Covers and Illustrations: Design compelling visuals based on text descriptions of characters or themes.
E-Commerce
Product Visuals: Create product images from descriptive text, enhancing online listings.
Custom Merchandise: Design visuals for custom merchandise based on user inputs.
Gaming and Entertainment
Concept Art: Develop concept art for characters or environments based on textual descriptions.
Character Design: Generate detailed images of game characters from descriptive text.
Education and Training
Educational Materials: Create illustrations for textbooks or e-learning modules.
Interactive Learning Tools: Develop tools that generate visual representations based on user input.
Personalization and Customization
Custom Avatars: Design personalized avatars for social media or gaming.
Artistic Creations: Transform ideas into custom artwork, providing a creative outlet for artists.
Research and Development
Prototyping Visuals: Use generated images to visualize new ideas and concepts in research projects.
Start creating stunning visuals for your organization with our advanced tools! Sign up for a free trial today!
Troubleshooting and FAQs
Common Issues
API Key Errors
If you encounter errors related to API keys, such as "Invalid API Key" or "Unauthorized Access," ensure that your API key is copied accurately in your request. Check that the key has the necessary permissions and is not expired. It’s also essential to verify that you have selected the correct API key in your request settings.
Image Generation Glitches
In cases where the API returns errors or fails to generate images, double-check the parameters being sent in your request. This includes the text prompt, the number of samples, and the image dimensions. Make sure that your request body is formatted correctly in JSON or your chosen format. Consulting the API documentation can help confirm that all required parameters are included.
Slow Processing Times
If image generation takes longer than expected, be aware that processing times can vary based on server load and the complexity of your request. Ensure you are not exceeding the rate limits for API usage. If delays persist, consider contacting support for assistance or checking for any system status updates from Modelslab.
Quality of Generated Images
Should the generated images not meet your quality expectations, review the style and filter settings you have applied. Experimenting with different models and parameters can lead to better results. For specific issues with image quality, refer to the API documentation or contact support for guidance on optimizing image outputs.
Integration Problems
If you experience difficulties integrating generated images into other applications or workflows, ensure that the images are downloaded correctly and in the appropriate format for your application. It’s important to check the compatibility of the image files with your integration requirements. For specific issues, refer to the integration documentation or reach out to support for troubleshooting help.
FAQs for Image to Image Generation
1. What is Image to Image generation?
Image to Image generation is a process that creates a new image based on an existing image. By providing a source image and a descriptive text prompt, users can guide the transformation to achieve customized results.
2. How do I start using the Image to Image API?
To get started, sign up for an API key from our platform. With your key, you can make POST requests to the Image to Image endpoint, providing the required parameters, including the initial image and prompts.
3. What file formats are supported for the initial image?
The API supports common image formats such as JPEG, PNG, and GIF. Ensure your image is in one of these formats before submitting your request.
4. How long does it take to generate an image?
Image generation times can vary based on server load and the complexity of your request. Typically, images are generated within a few seconds, but it may take longer during peak usage times.
5. What should I do if the generated images do not meet my expectations?
If the images do not match your expectations, review and adjust your prompts and settings. Experimenting with different styles or refining your descriptions can lead to better results. You can also consult the API documentation for additional optimization tips.